Step 4: Programming #
We are now ready for the final step of programming and configuring the AutCorder for its particular use case. This would also be the place to jump in for reconfiguring a previously used AutCorder for others.
Requirements #
- A computer with a USB port, and the Arduino IDE Installed. Any operating system supporting the IDE should work (Windows, Mac, Linux).
- A USB-C cable
Sub-Steps #
Installing software prerequisites #
To flash the AutCorder with its software, you need to have the Arduino IDE installed. The IDE needs to have the (official) ESP32 boards installed (Installation guide. The AutCorder-Arduino repository should be downloaded (and extracted if from releases).
Flashing the AutCorder software #
To flash the code, you should
- Open the AutCorder-Arduino project in the Arduino IDE.
- Select Tools -> Board: -> esp32 -> ESP32S3 Dev Module
- Set all the options in the bottom half of the Tools menu to the following:
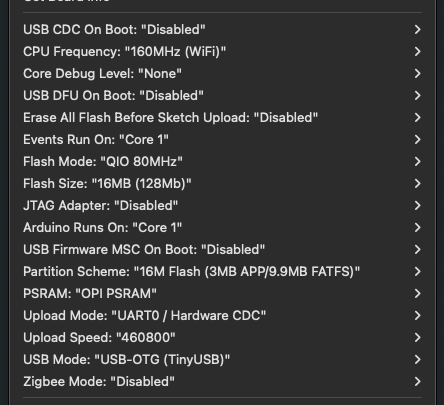
- The important settings to get right here are Flash size, Partition scheme and PSRAM, as setting these wrong will likely make the software fail to compile or crash during use.
- Connect the AutCorder board to the computer using a usb data cable, and select it in the IDE.
- If this is the first time flashing the device, the device should appear in the Tools -> Port: menu. If it has been flashed before, you should attach it and then hold down the FW button on the board, while giving the RST button a press, before it appears (for a limited time).
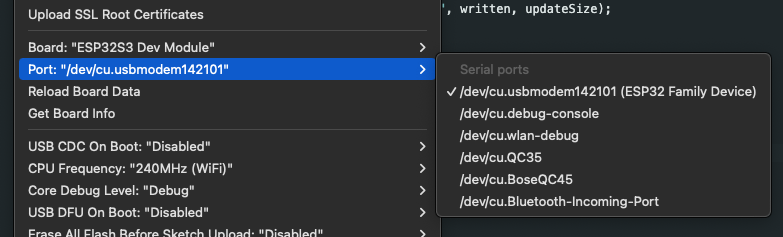
- Note: The device may not appear while the menu is open, and may appear under different names depending on the computer and operating system used. The simplest approach here is just to open the menu, memorize what items are already on the list, close it again, attach the AutCorder, open the menu again, and select whatever new thing appeared in the list.
- If this is the first time flashing the device, the device should appear in the Tools -> Port: menu. If it has been flashed before, you should attach it and then hold down the FW button on the board, while giving the RST button a press, before it appears (for a limited time).
- Click the upload button (in the top left corner), to start compiling and then uploading the software to the device. If the device has been flashed before, you may again need to do the FW-RST maneuver after having pressed upload, as it might otherwise fail to connect.