Step 3: Figuring out a power supply #
The NeoInfinity badges are quite voltage tolerant (around between 2.8V and 5.5V), and can therefore be powered from many different sources, from USB power supplies and power banks to directly from various battery types. This page is a short overview of different power supply strategies and things to note about them.
Warning: Don’t ever connect multiple power sources at once!
The badge can be powered through either the JST PH connector, the programming header, or the power and ground solder pads. These three connectors are wired in parallel, and making multiple connections at once might therefore result in backfeeding of power. Worst case, this could cause permanent damage to the board, power supplies, and their surroundings depending on the safety and capacity of the supplies.Especially, do not plug in a programmer while the board is powered from battery! This is easy to accidentally do and could potentially have incendiary consequences!
USB power supply or power bank #
If making a non-worn installation with the badge, powering it with a USB power supply is by far the easiest solution. Similarly, a tiny power bank in a shirt pocket may be a quick way of powering a worn badge. Adapter cables from USB-C socket to JST PH plug can be found on various online markets like AliExpress. With these, the badge can be powered from a USB supply with no additional soldering.
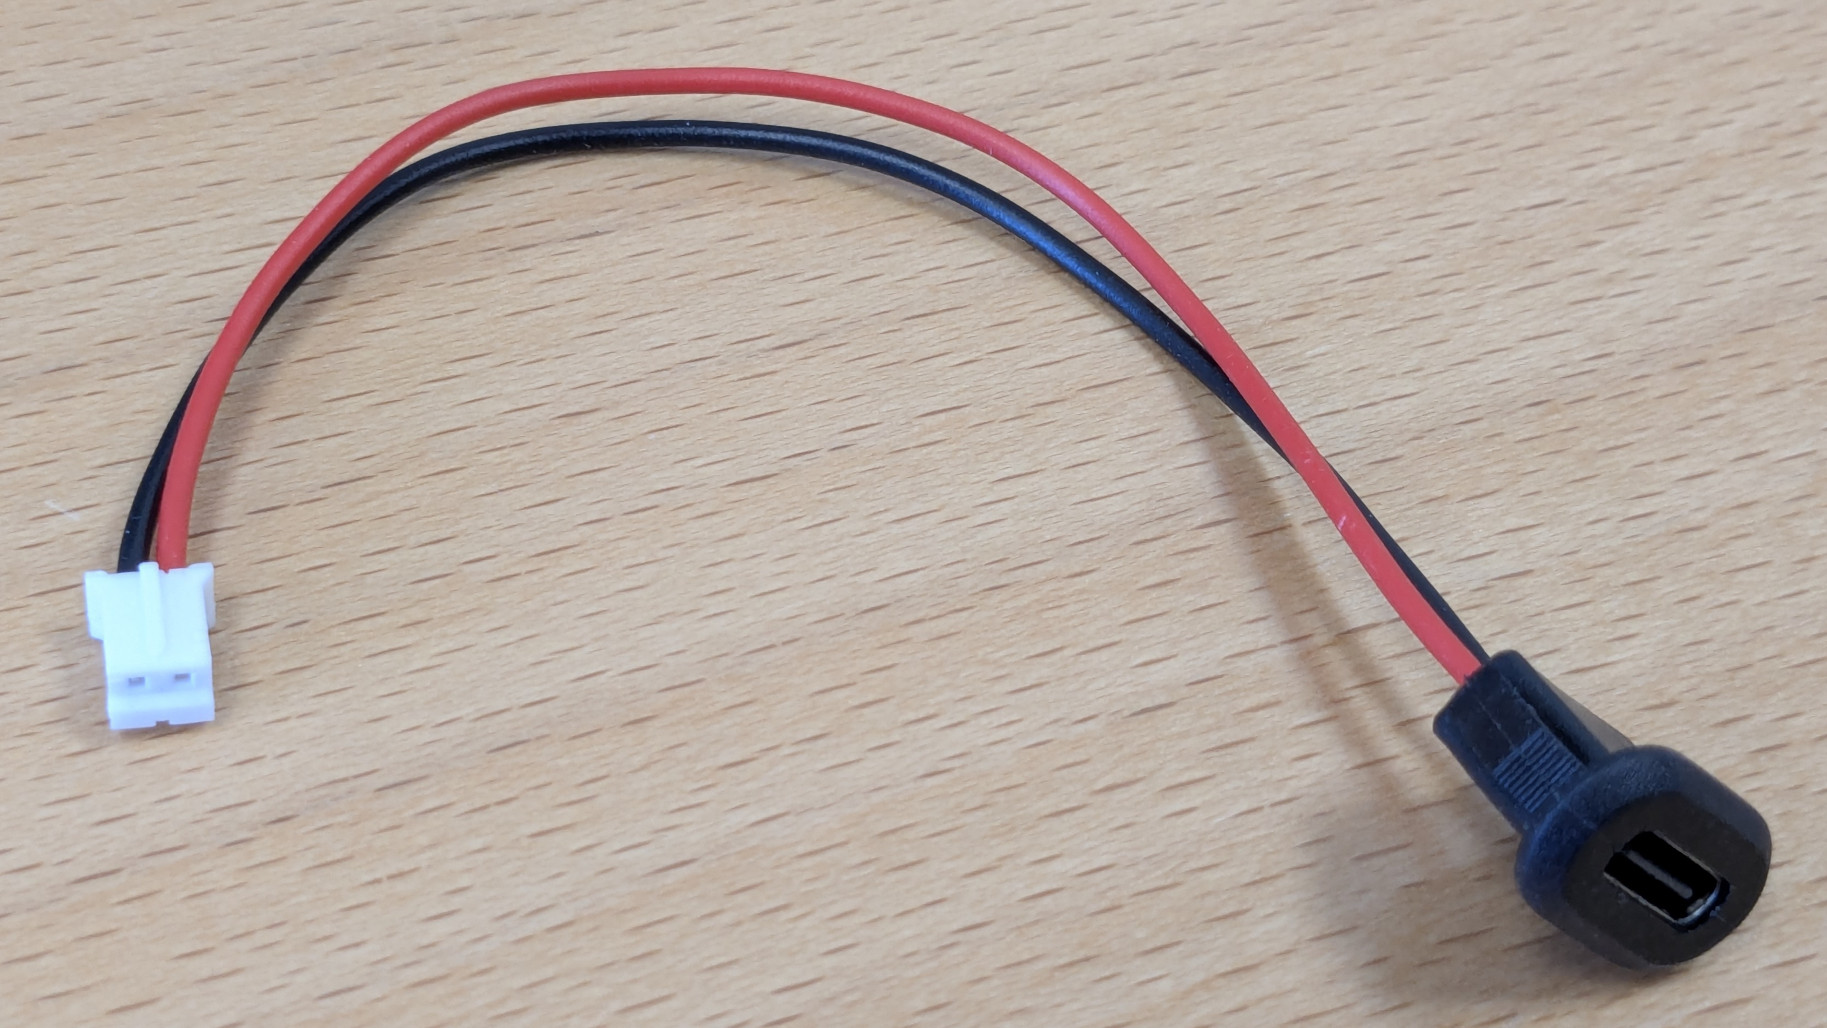
Do note that none of the USB-C adapter cables I’ve come across have pulldown resistors on their CC pins, hence they will not power from native USB-C supplies and cables, only USB A-C cables.
For power banks, note that many use the detection of low current consumption to switch off their boost circuit and save battery power. Since the badge consumes very little power, it may not be able to keep such power banks turned on. A lot of cheaper banks do not have this feature, and are therefore easier to use with the badge.
LiPo cell #
Since the NeoInfinity badge can run across the entirety of the usable capacity of a single LiPo cell, powering it with a 1S LiPo battery is as simple as plugging it in. LiPo batteries using the JST PH connector are rather easy to find. The same batteries as used for the AutCorders is a reasonable fit, and should provide about 10 hours of power.
Before plugging in, double check that the polarity of the battery is the same as on the badge.
Do once again be aware that the badge has no charge or discharge protection circuitry, therefore:
- You should use a battery with built in discharge protection to avoid permanently damaging the battery if left plugged in.
- The badge must not be plugged in to any other power source alongside a LiPo cell.
- The battery must be charged using a separate, fitting LiPo charger.
If you have single cell LiFePo4 batteries, these should also be able to work just fine (and provide more consistent brightness across their discharge).
AA battery pack #
For something more easily recharged or replaced, a pack of AA or AAA batteries can also power the badge. The tradeoff here is a significantly lower capacity to weight and volume compared to LiPo batteries. The number of batteries to use depend on the battery chemistry used. Alkaline: With a nominal voltage of 1.5V, a pack of 3 batteries (making 4.5V) would make an appropriate supply. NiMH: Rechargeable NiMH batteries have a nominal voltage of 1.2V. For these, a pack of 4 batteries (for 4.8V) would be appropriate.
I have not been able to find AA or AAA battery packs with JST PH connectors, but one is easily constructed by chopping one of the USB-PH adapter cables and soldering it onto the battery pack.
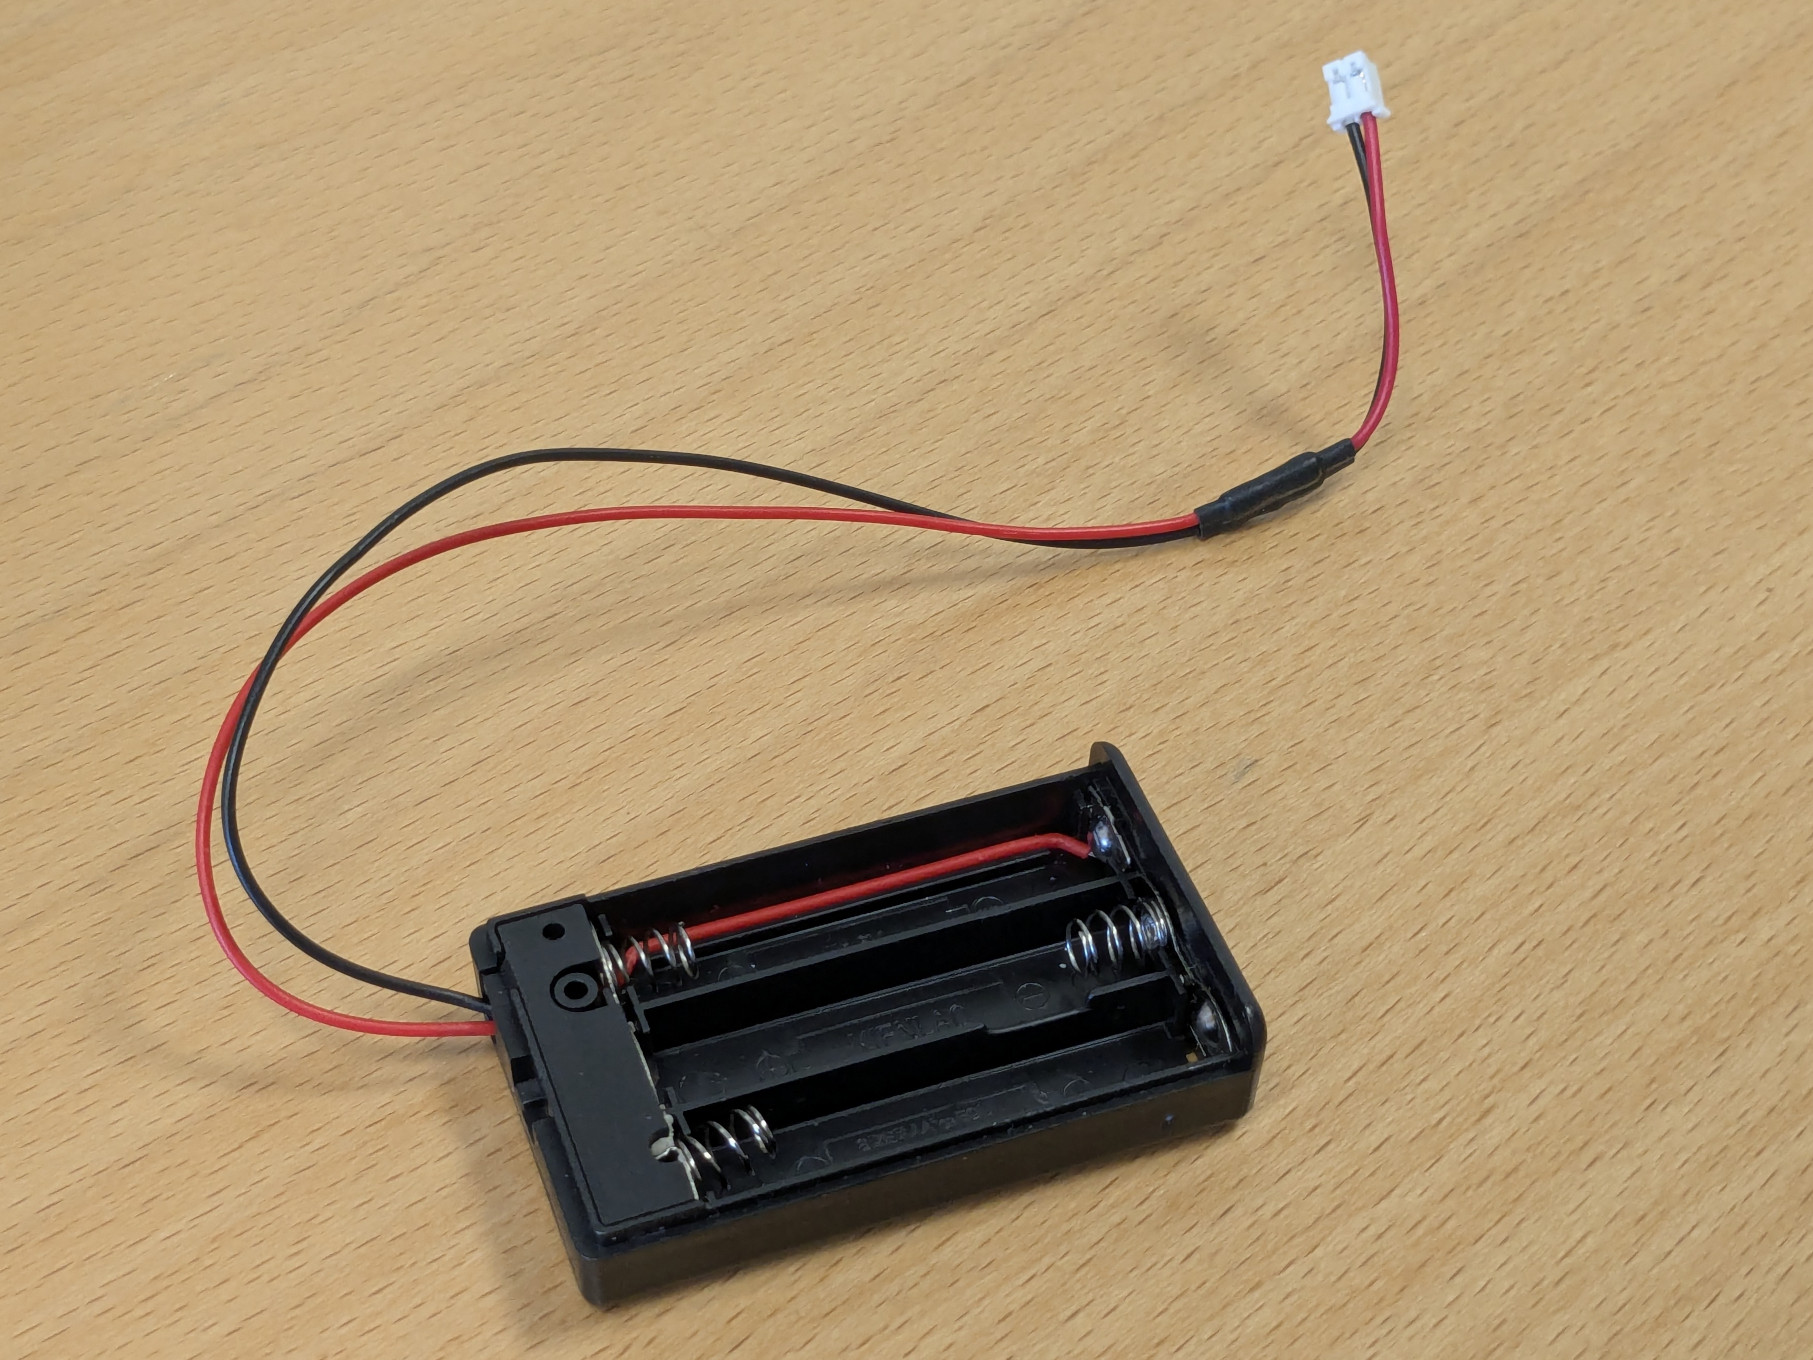
Note that putting alkaline batteries in a pack of 4 would make for 6V, which is outside the specifications of the ATTiny MCU and WS2812 LEDs, and could potentially damage the badge.
Notes on power consumption #
The power consumption of the badge is very dependent on both the brightness set, and the source voltage. Further, the actual brightness of the LEDs is also very dependent on voltage. A few measurements across voltages from low to high brightness (on the rainbow color preset):
- 2.8V: 11mA to 17mA
- 3.6V: 15mA to 37mA
- 4.1V: 20mA to 60mA
When calculating needed capacity for not-too-bright indoor use, going with an average consumption of around 20mA is a pretty safe bet. With a 350mA battery, this should give around 17 hours of on-time.
Note that the badge appears to run stable down to at least 2.6V, but that the blue LED looses significant intensity compared to the green and red LEDs below 2.8V