Step 2: Programming #
Programming the NeoInfinity badge is rather straight forward for anyone familiar with the Arduino. In short, it involves opening the Arduino project, installing Spence Kondes megaTinyCore core, configuring the board settings, connecting and then flashing the board.
Requirements #
- A computer with a USB port, and the Arduino IDE Installed. Any operating system supporting the IDE should work (Windows, Mac, Linux).
- A UPDI programmer board.
Sub-Steps #
Installing software prerequisites #
To flash the badge with its software, you need to have the Arduino IDE installed. The IDE needs to have the megaTinyCore core for tinyAVR MCUs installed (Installation guide). The NeoInfinity repository should be downloaded.
Flashing the badge software #
To flash the code, you should
- Open the NeoInfinity project in the Arduino IDE.
- Select Tools -> Board: -> megaTinyCore -> ATtiny412/402/212/202
- Set all the options in the bottom half of the Tools menu to the following:
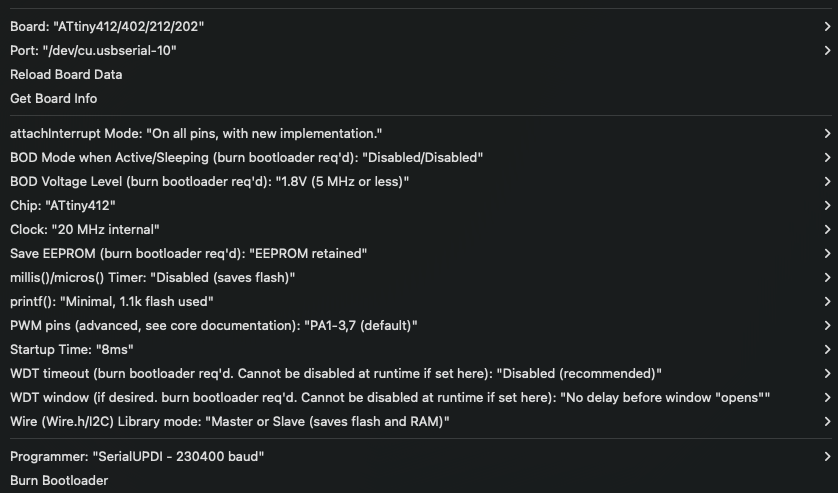 The important settings to get right here are Chip type, millis())/micros()) Timer, printf(), and the appropriate programmer, as setting these wrong will likely make the software fail to compile burn.
 - Connect the badge to the computer using a UPDI programmer, and select it in the IDE.
- Remember to select the appropriate programmer for your UPDI board.
- Click the upload button (in the top left corner), to start compiling and then uploading the software to the device.