Using your checklist #
Understanding the checklist interface #
Overall, using the checklist consists of three different types of interactions: Switching between checklist pages, recording new checklist notes, and navigating through and crossing out notes. This section provides a detailed description of the checklist interface.
Conceptualizing the checklist #
The checklist can be seen as a combination of a regular written (multi-page) checklist and a dictaphone. A checklist has one or more pages which can be dedicated to different purposes such as home or work tasks, hobby ideas, or shopping items, and can be flipped between using dedicated buttons. Each page in turn has a number of recorded notes of things to remember or do in the future. After notes have completed their purpose, they can be crossed out. To maintain overview of active notes, crossed notes are moved out of the way after completion. Adding new notes to the list is done by recording voice messages using the checklist, which are then transcribed using a remote service.
Screen overview #
On most occasions, the checklist screen is separated into seven slices. The upper-most part shows the state of the checklist, while the remaining six show entries on the current checklist page. The status area consists of a status bar at the top, and the name of the currently displayed checklist page below. The status bar may show a number of different icons depending on configuration and status:
In the middle is always either shown a sun
 or moon
 . This indicates whether the checklist is awake or sleeping. This in general should not matter too much, as the checklist awakes from, and then acts on, any input quickly. The checklist should generally only be awake during and shortly after interaction or transcription. If the checklist is awake more often, this could be a sign of technical issues or misconfiguration.
From the right:
- The lock icon
 /
/
 indicates whether the checklist is locked or not. If locked, none of the buttons activate the device, avoiding accidental input. See the section below for more info.
 - The battery icon
 /
/
 indicates the battery level of the checklist. The battery starts out filled and gradually drains to empty.
 - If wifi connectivity is enabled in the configuration, the wifi icon
 shows whether the checklist is connected to a wifi network and is otherwise crossed out
 . Wifi connectivity is only active when transcribing notes and on initial boot.
 - If Bluetooth connectivity is enabled in the configuration, the Bluetooth icon
 /
/
 shows whether the checklist is available for connection.
 - If enabled in the configuration, the last four digits of the checklists MAC address is shown in a square. This may be useful for locating the checklist on a network.
From the left:
- If enabled, a 24 clock is shown. Note that depending on configuration, this may not be accurate to the minute.
- If enabled, the number of notes, and how many of them are crossed out, on the current page is shown.
- If a recording is waiting to be transcribed through wifi or BLE, an hourglass icon
 is shown. If multiple recordings are waiting, this is indicated with a number.
 - If the checklist is currently running a background process (such as transcription), a cog is shown
 .
.
Input #
For input, the checklist has 8 buttons and a three-position sliding switch:
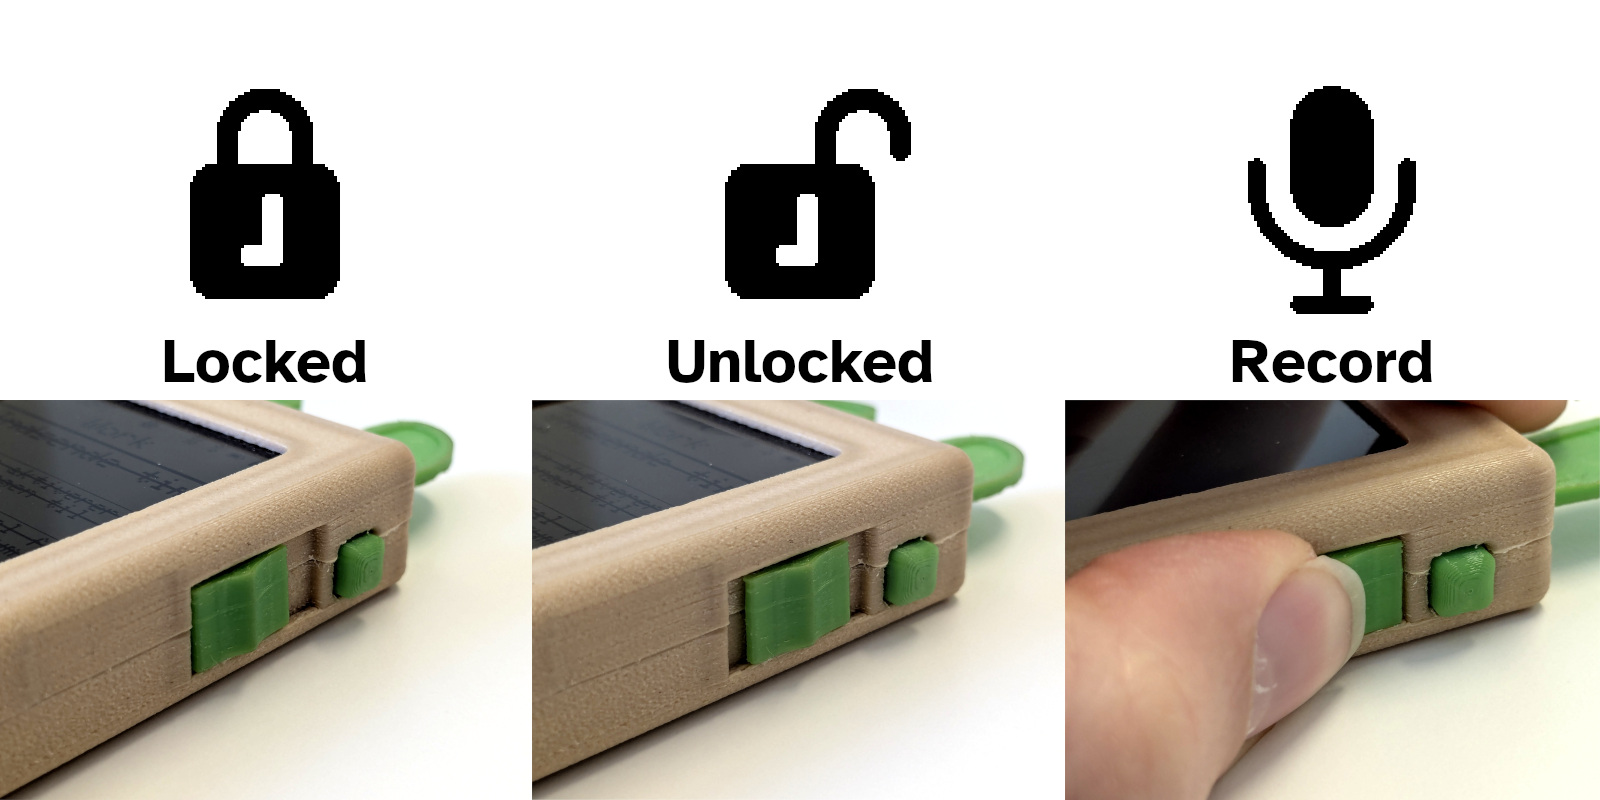
When pocketed or otherwise left in a place where its buttons can get bumped, the sliding switch of the checklist should be left in the bottom position. This locks the device and temporarily stops any of the buttons from working. In the middle position, the checklist is unlocked and the buttons can all be used. Sliding the switch to the third, upmost position will start the recording of a new voice memo. This position is spring loaded, so the slider will return to the middle position as soon as it is let go, ending the recording. On completion, the recording is saved to internal memory, and is then transcribed opportunistically (when a wireless connection becomes available), and the note is eventually added as an item on the checklist page which was open when the recording was begun.
The upper two buttons on each side of the checklist are used to switch between checklist pages:
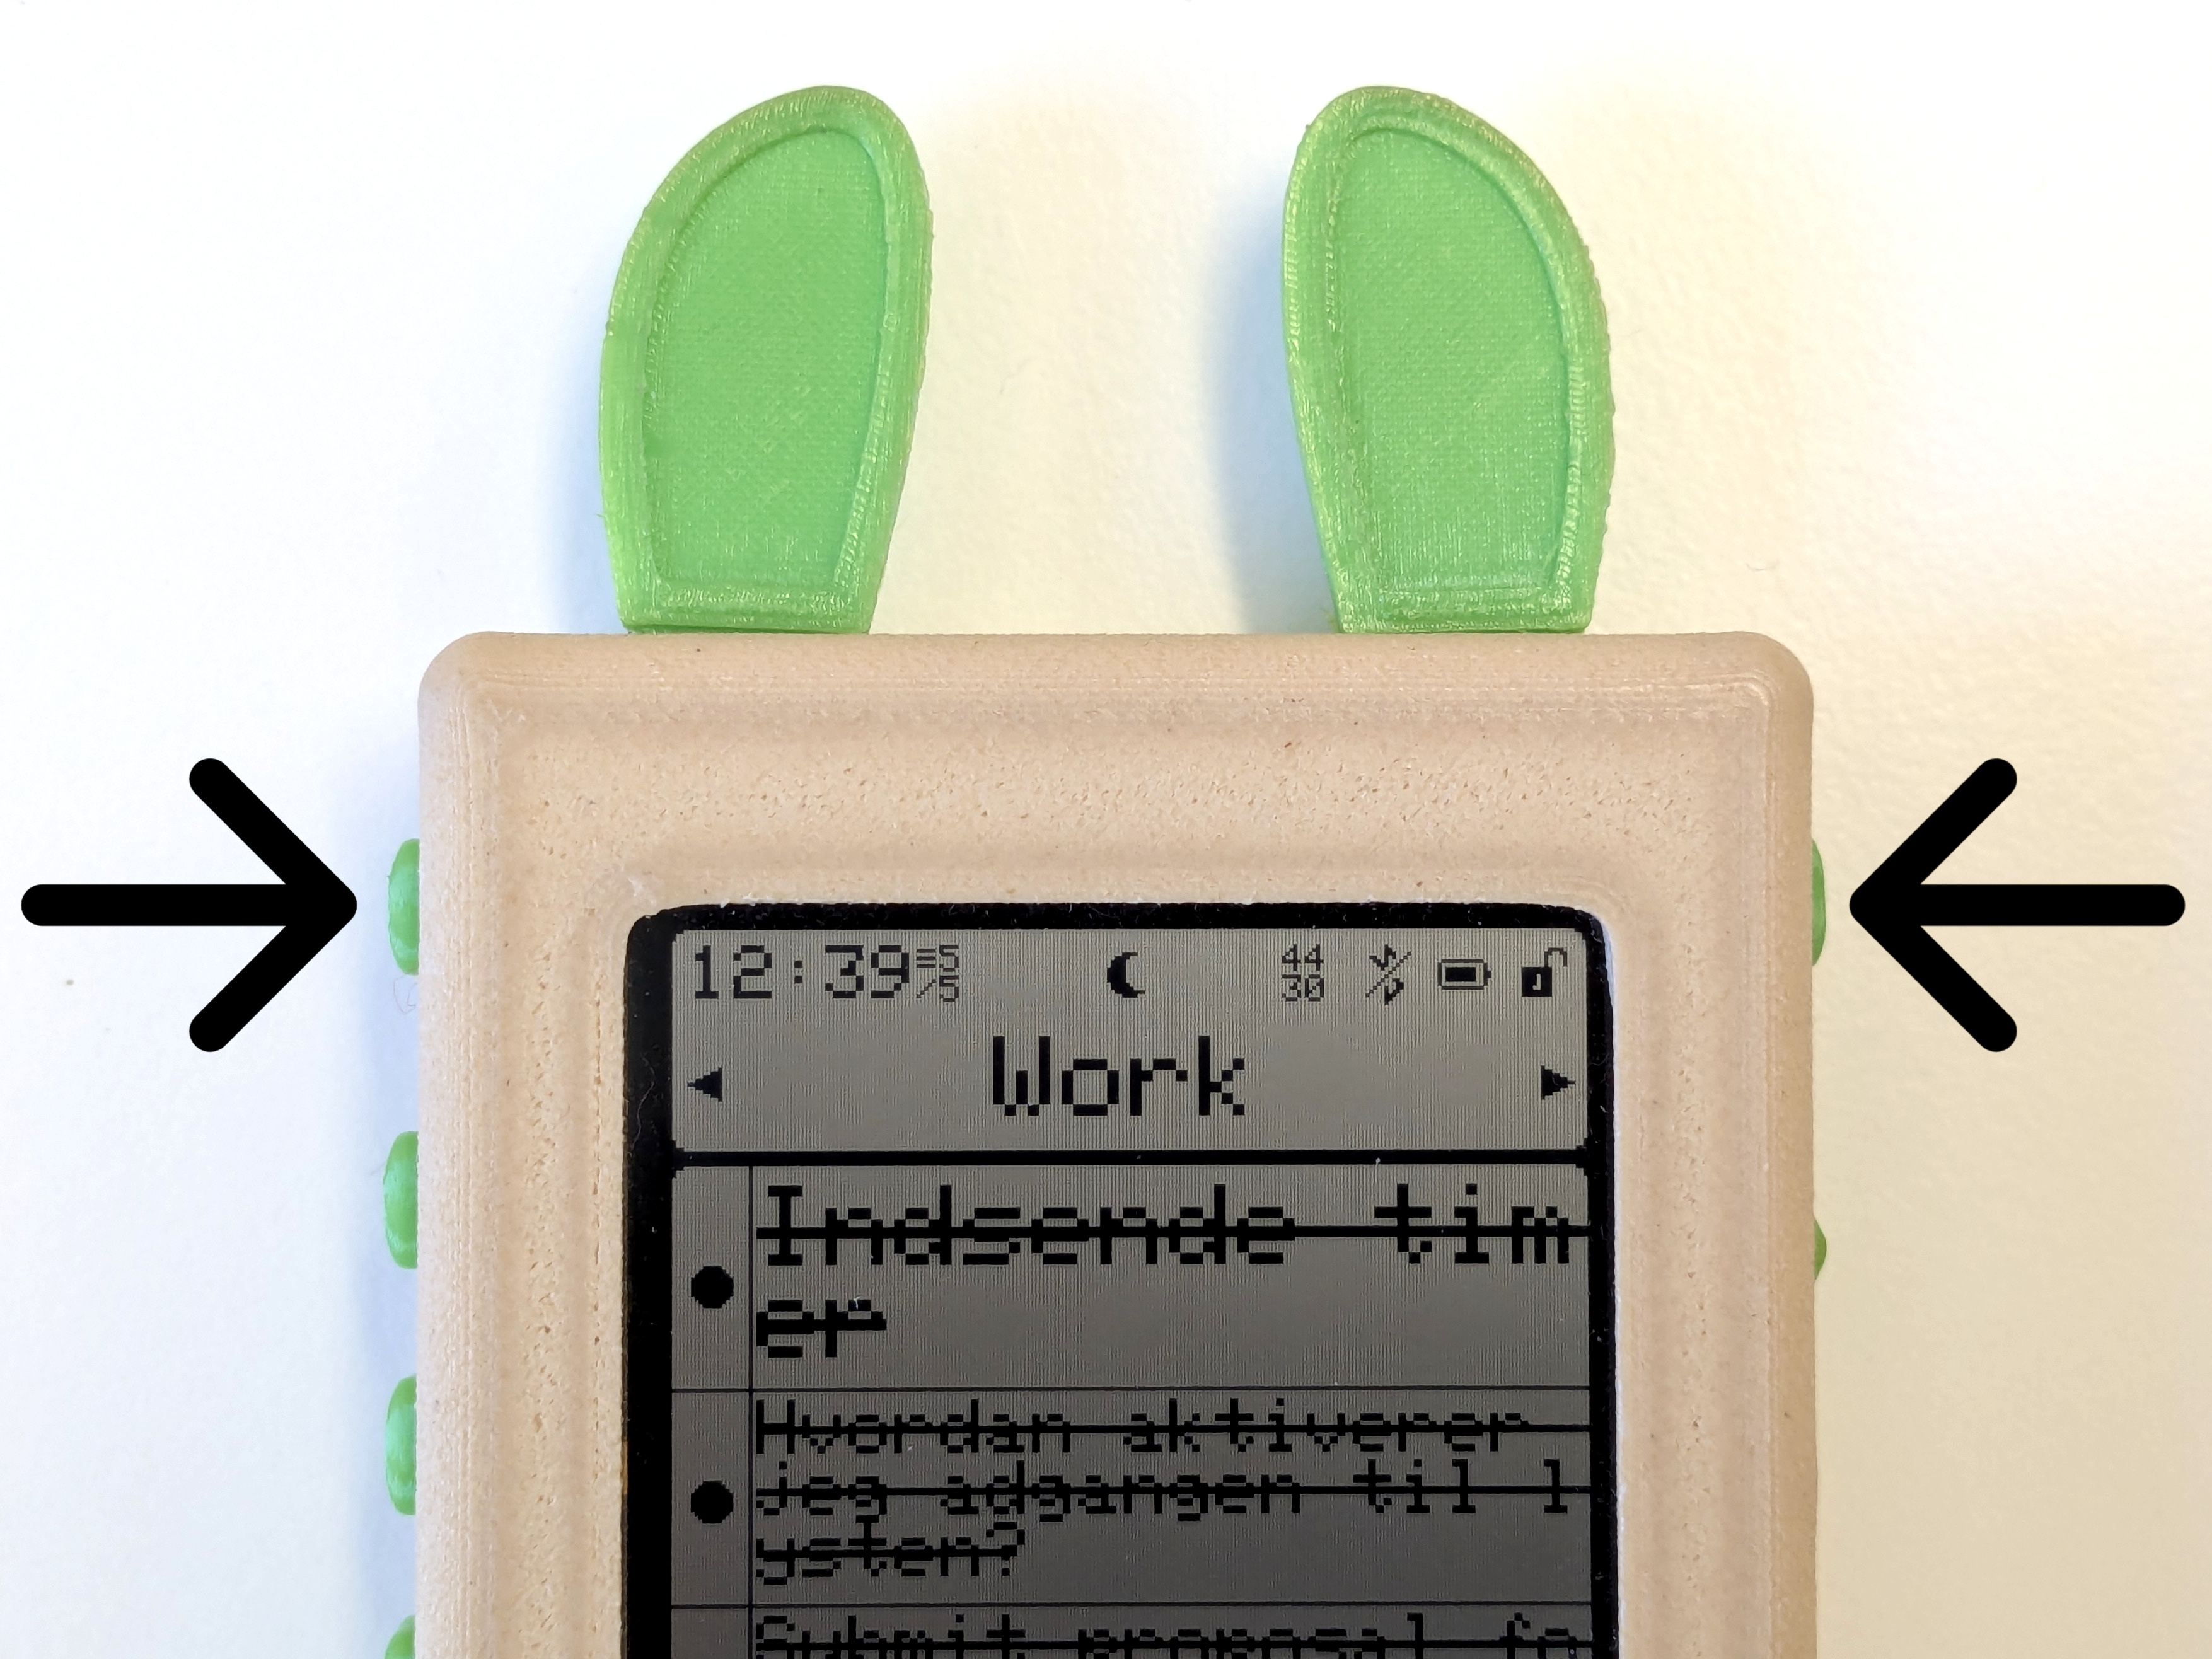
By pressing a button, the next page in that direction is turned to. When turning past the last page of the checklist it will cycle back around to the first page, or vise versa. If only one page has been configured for a particular checklist, these buttons will not do anything.
The six button array on the left of the checklist lets you manipulate the items on the checklist page:
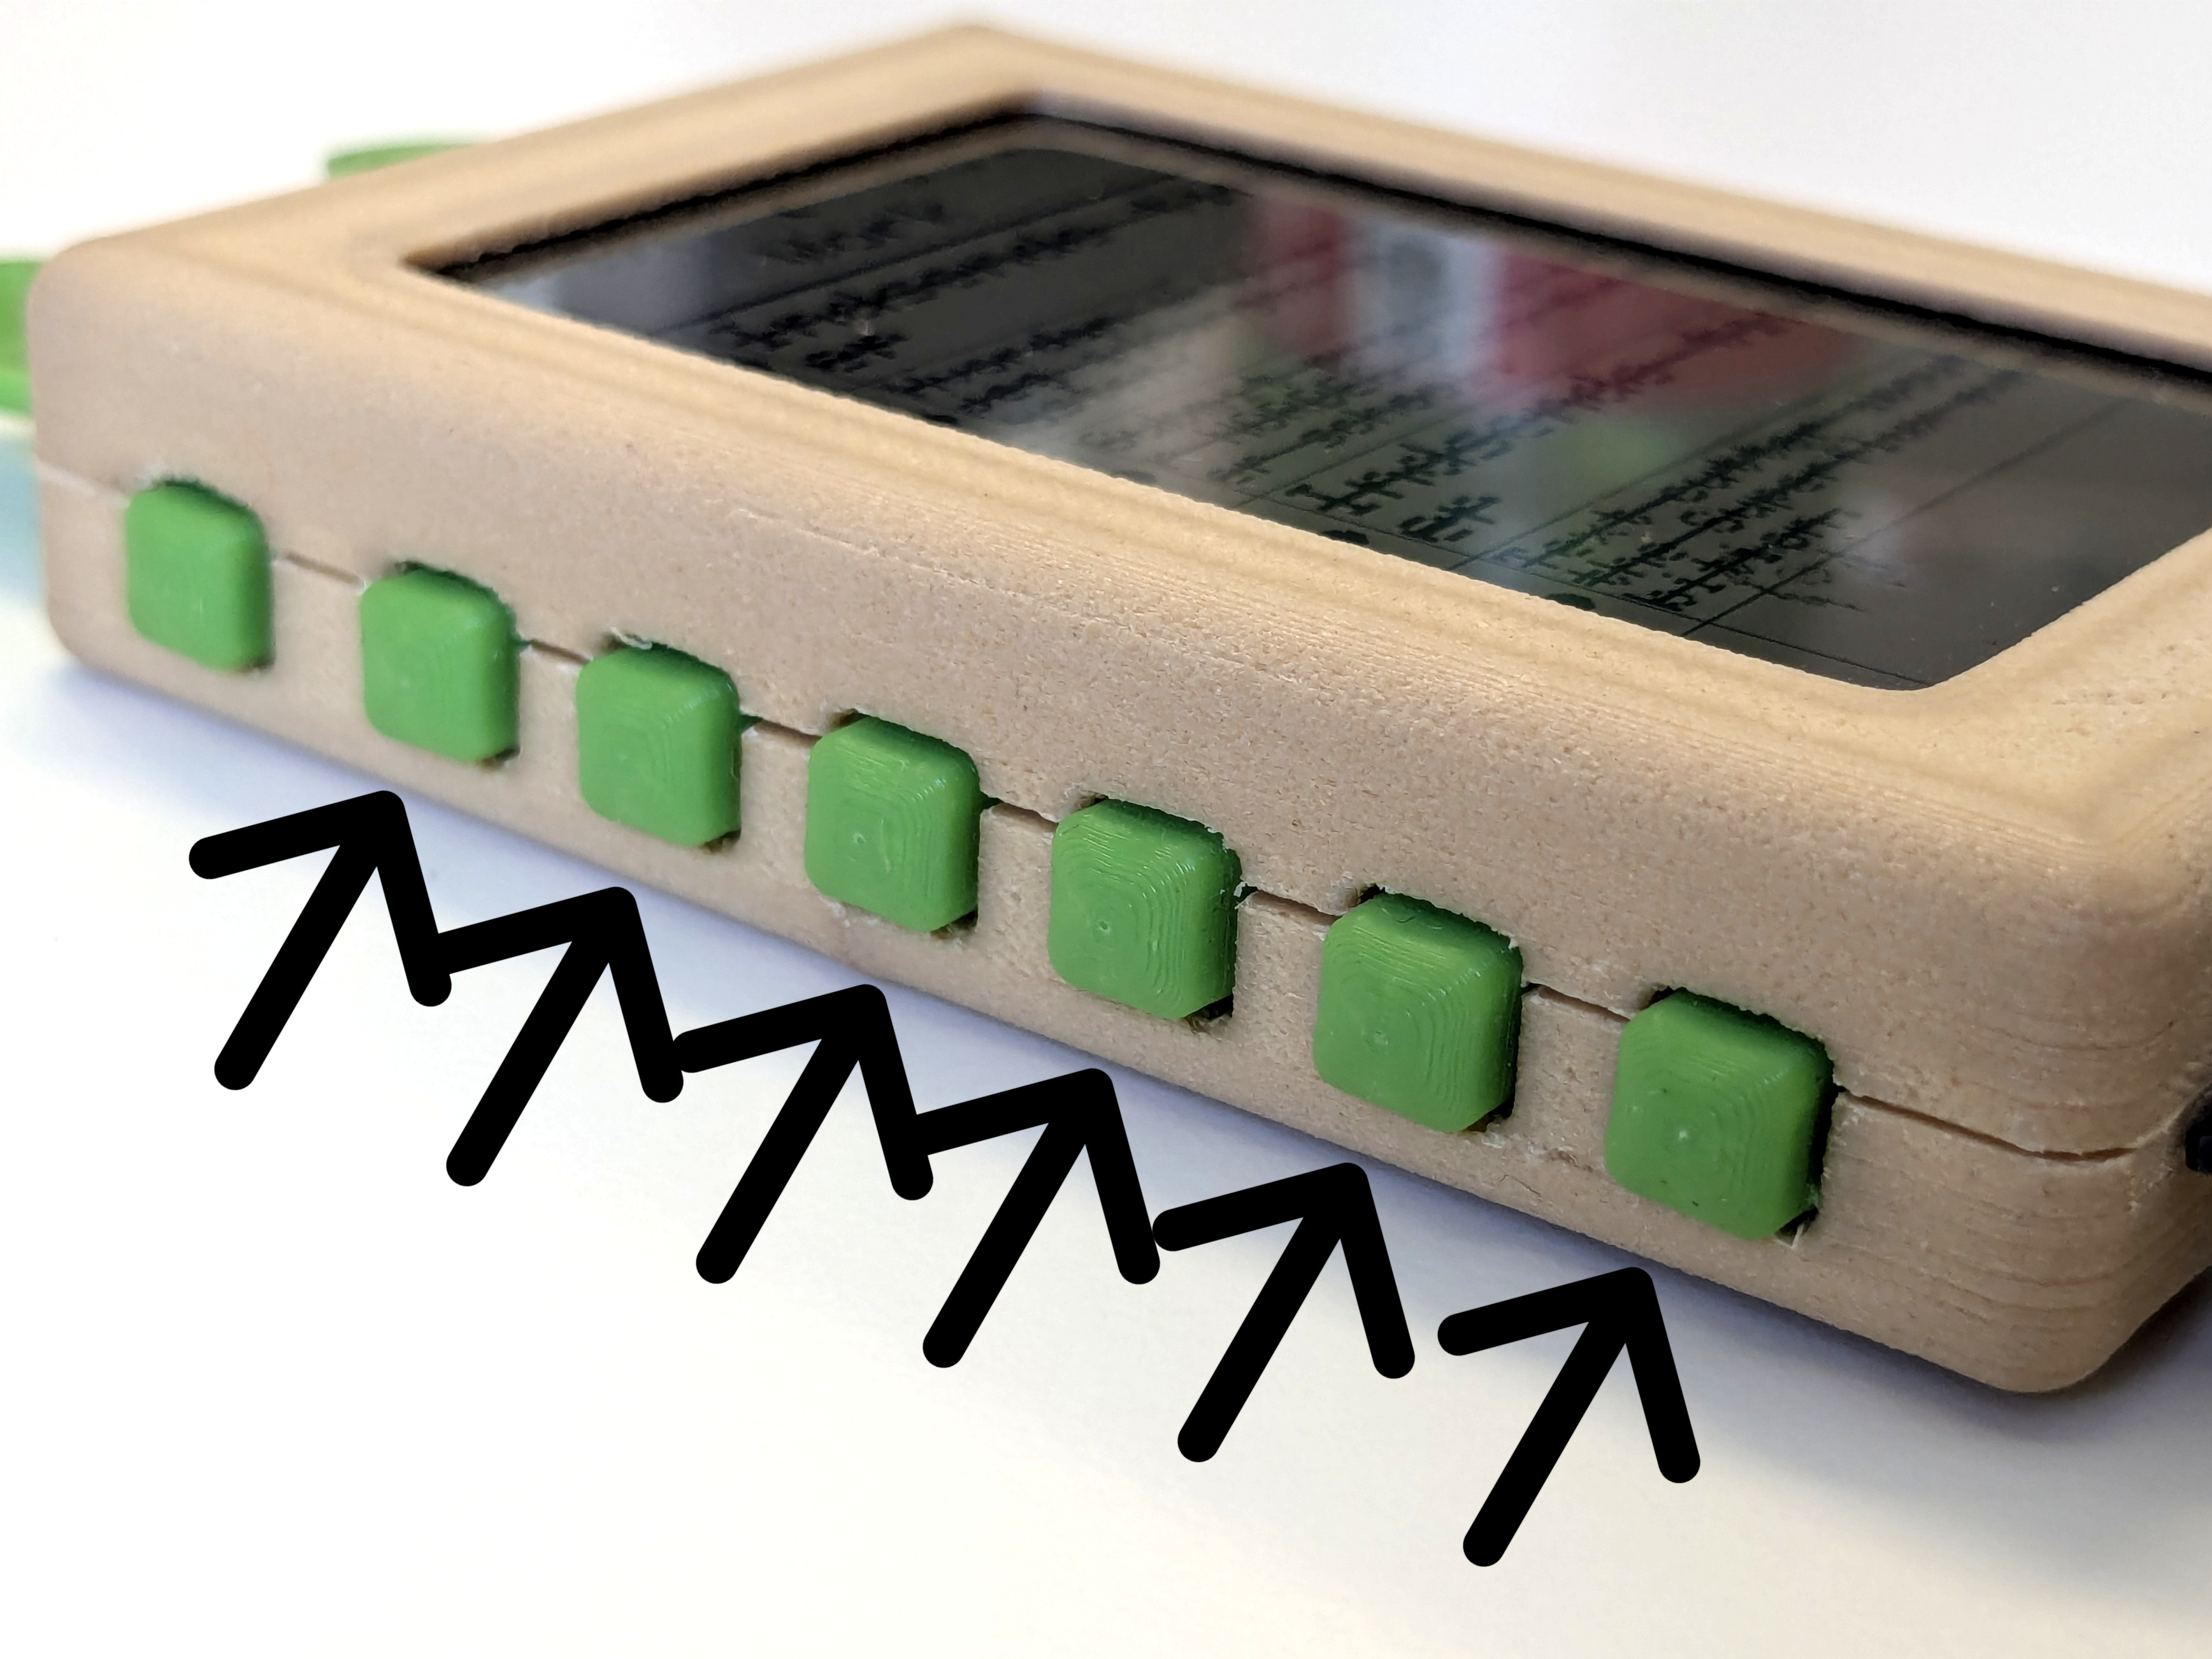
Each button corresponds to each of the six items on the screen, and the symbol to the left of the note reflects which action the button will activate if pressed. For an open or filled circle, holding the corresponding button will cross out (or uncross) the note in the field. If enabled for the page, crossed out notes will be sorted to one end of the list, and eventually deleted completely after a configurable while. On a short press, the corresponding note will instead be shown in full screen, which can be exited again by pressing any of the six buttons. If there are more than six items on a given page, the upper or lower most icon changes to an upwards or downwards arrow. Pressing the corresponding button will then scroll the list upwards or downwards. The scroll button can be held for continous scrolling.
Recharging and reconfiguring #
If the checklist runs out of battery power entirely, the screen will turn off. Don’t worry, your notes are safe in non-volatile memory. To recharge the checklist, simply plug it into any USB C power supply, a phone charger, your laptop, etc. While the device is charging, an orange LED by the charge port is lit. When the LED goes out, charging has finished. Expect charging from empty to take a few hours. Of course, the checklist can be unplugged before fully charged without issue. If you plug the checklist into a computer using a USB data cable, it should appear on the computer as a small flash drive. Using the files, the checklist can be reconfigured. See the Configuration for more info. While plugged in, the checklist will switch to exclusively showing a USB logo. Once unplugged the checklist will reboot and return to normal operation.
Recurring tasks #
Using the inbuilt cron functionality, notes can be set to reappear at a regular pace, to remind of daily, weekly or monthly tasks. Configuring this is further documented on the Cron configuration page.
Additional I/O #
Beyond the screen and buttons, depending on configuration, the checklist may have an additional notification LED, battery charging LED, vibration motor, and potentially a speaker. These can be configured to work in different ways.
The secret debug menu #
Warning: The debug menu can be used to entirely wipe your checklist, so be careful if using it. While the checklist is locked and sleeping, if both page-turning buttons are held, while the device is plugged into power, the secret debug menu is opened. This menu can be used to reboot, reset and update your checklist over WIFI or through the file system, by pressing the corresponding list button.